
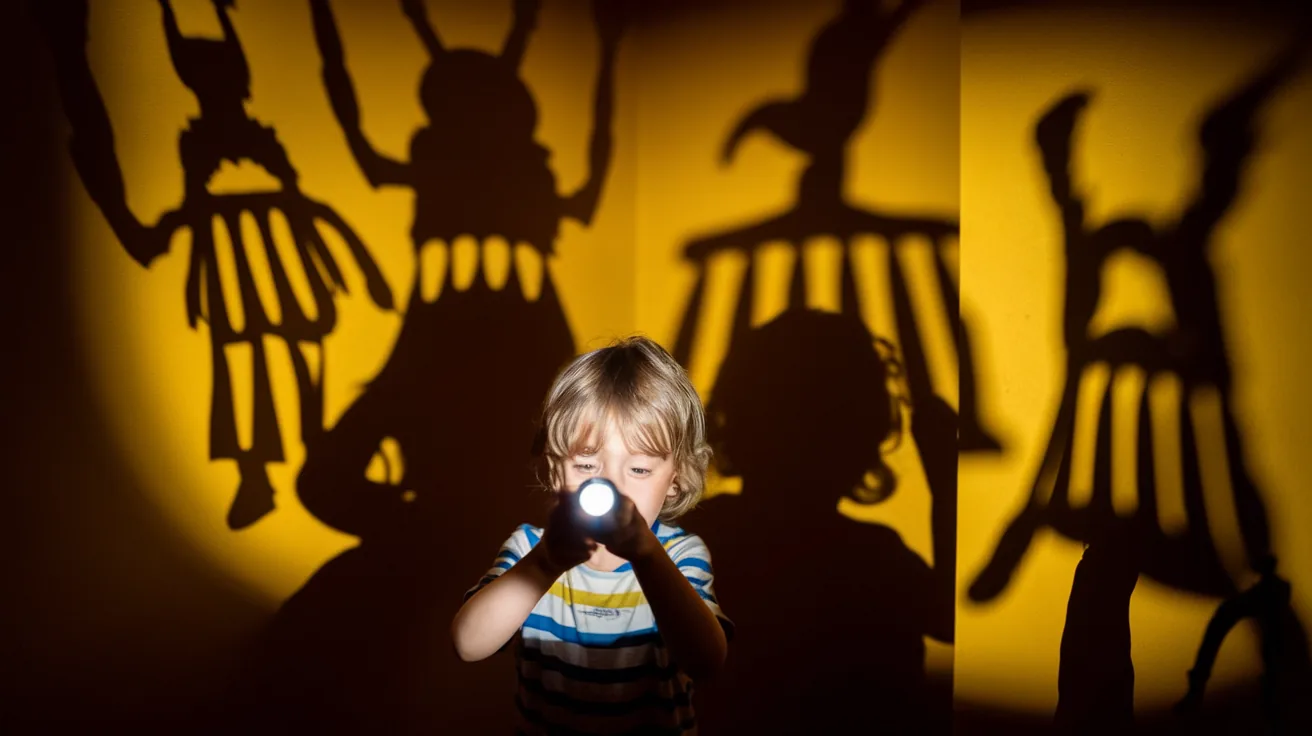
If your Year 3 child has come home asking why their shadow is sometimes tall and sometimes short, or why they can't see their shadow on a cloudy day, they are asking about the Year 3 light unit. Light and shadows seem simple, but they challenge some strong intuitions that children (and adults) have about how seeing works.
This guide explains what Year 3 children need to understand about light and shadows, the common misconceptions, and practical ways to support learning at home.
What Do Year 3 Children Learn About Light and Shadows?
The Year 3 light and shadows topic is part of the National Curriculum's "Light" strand for KS2. By the end of this unit, children should be able to:
- Recognise that they need light to see things and that darkness is the absence of light
- Notice that light is reflected from surfaces
- Recognise that light from the sun can be dangerous and that there are ways to protect their eyes
- Explain how shadows are formed when light is blocked by an opaque object
- Investigate patterns in the way that the size of shadows change
The Key Ideas: We Need Light to See, and Light Reflects from Surfaces
The two most important ideas in Year 3 are that we need light to see things, and that darkness is the absence of light. Children also notice that light bounces (reflects) from surfaces, and that shiny surfaces reflect it better than dull ones.
The full explanation of how we see, that light from a source reflects from an object and travels into our eyes, is a Year 6 objective. Your child does not need it yet, but if they ask, it is the honest answer, and it explains a lot:
- Why we can't see in a completely dark room (no light to reflect off objects)
- Why shiny objects look different from dull ones (they reflect light differently)
- Why turning on a light "reveals" objects that were always there (now there's light to reflect off them)
- Why mirrors show images (they reflect light very efficiently in predictable directions)
Sun Safety
The unit also requires children to know that light from the sun can be dangerous and that there are ways to protect their eyes. The rules are simple: never look directly at the sun, not even through sunglasses, a camera or a phone screen; wear sunglasses and a hat in bright sunlight; and never point a magnifying glass or mirror towards the sun or at someone's eyes. For families in Dubai, Riyadh or Kuala Lumpur, where the midday sun is very strong for most of the year, this is a rule children will use every day.
How Are Shadows Formed? The Year 3 Explanation
Shadows form when light travelling in straight lines is blocked by an opaque object. The area behind that object receives no light, creating a shadow.
Here's how to break this down for Year 3 understanding:
Light Travels in Straight Lines
Light does not curve around corners or bend around objects. It travels in straight lines from its source. (This is stated formally in Year 6, but Year 3 children use the idea informally to explain shadows.) You can demonstrate this with a torch shining through a gap or creating a beam of light in a dusty room.
Transparent, Translucent, and Opaque Materials
Different materials interact with light differently:
- Transparent materials (like clear glass or water) let light pass through almost completely. You can see clearly through them, and they don't create dark shadows.
- Translucent materials (like frosted glass or tissue paper) let some light through but scatter it. You can't see clearly through them, and they create faint, blurry shadows.
- Opaque materials (like wood, metal, or your hand) block light entirely. They create clear, dark shadows.
The Shadow Is Where Light Can't Reach
Behind an opaque object, there's an area where light from the source cannot reach because the object is blocking the straight-line path. This area appears dark compared to its surroundings — that's the shadow.
An important point: shadows are not "things". They are the absence of light. You can't create a shadow by itself; you can only block light from reaching a surface.
Why Do Shadows Change Size? Understanding Shadow Length and Shape
One of the most engaging investigations in Year 3 light is exploring how shadow size changes. This introduces children to careful observation, pattern-seeking, and the relationship between variables — core scientific skills.
Distance Between Light Source and Object
When a light source moves closer to an object, the shadow gets larger. When the light source moves away, the shadow gets smaller.
Why? Imagine light rays spreading out from a bulb. When the bulb is close to an object, the object blocks a larger cone of light rays, creating a bigger shadow. When the bulb is far away, the rays are more parallel, and the object blocks a smaller area.
Children can investigate this using a torch, a toy, and a wall. Move the torch closer and further from the toy, and watch the shadow grow and shrink on the wall.
Distance Between Object and Surface
When an object moves further from the surface where its shadow appears, the shadow gets larger and blurrier. When it moves closer to the surface, the shadow gets smaller and sharper.
This happens because the blocked light creates a cone-shaped region of shadow. The further you go down the cone, the wider it gets. Put your hand close to a wall, and the shadow is nearly the same size as your hand. Move your hand away from the wall, and the shadow grows.
Angle of the Light Source
This is why your shadow is very long in the early morning or late evening, short at midday, and different lengths at different times of year.
When the sun is low in the sky (near the horizon), it hits you from a low angle. Your body blocks light across a much longer distance along the ground, creating a long shadow. When the sun is directly overhead at noon, your body blocks light almost straight down, creating a very short shadow beneath you.
This is one of the easiest patterns in nature to observe, and it connects to the Year 5 Earth and space unit. If you live close to the equator, in Kuala Lumpur or Singapore for example, the midday shadow can almost disappear because the sun is nearly straight overhead.
Common Misconceptions About Light and Shadows in Year 3
Understanding where children typically struggle helps you support them more effectively. Children commonly hold several misconceptions about light and shadows.
Misconception 1: "We Can See in the Dark if We Wait Long Enough"
Many children believe that eyes adjust to darkness and can then see without any light.
Why it persists: At home, "the dark" is almost never complete. A little light comes in from a window, a landing or a standby light, and after a few minutes the eyes make good use of it.
The reality: With no light at all, nothing can be seen, however long you wait. Darkness is the absence of light.
How to address it: Find the darkest place you can, such as a windowless bathroom or a cupboard, and ask: "Can you see anything at all? Where is the little light that is left coming from?"
Misconception 2: "Shadows Are Physical Objects or Substances"
Some children think of shadows as a kind of dark substance that gets created when you block light, almost like a dark twin of the object casting it.
Why it persists: Shadows have edges and shapes, like objects. They appear reliably whenever you block light. It's natural to think of them as "things."
The reality: Shadows are simply areas where light is absent or reduced. They're the absence of something, not the presence of something.
How to address it: Point out that shadows don't exist on their own. You can't pick up a shadow, move it, or create one without blocking light. The shadow disappears instantly when you remove the object or the light source.
Misconception 3: "Shiny Objects Are Light Sources"
Children sometimes confuse reflective objects (like mirrors or shiny metal) with objects that produce their own light (like light bulbs or the sun).
Why it persists: Shiny objects can appear very bright, almost like they're glowing.
The reality: Most objects we see are reflecting light from actual light sources. Only a few objects produce their own light: the sun, flames, light bulbs, and certain chemical reactions.
How to address it: Try looking at a mirror in a completely dark room. It won't shine or glow because there's no light to reflect. This demonstrates that reflective objects depend on external light sources.
Misconception 4: "Light Doesn't Fill the Entire Room"
Some children think light travels in a narrow beam from its source, like a torch beam, and doesn't spread out to fill an entire space.
Why it persists: Visible torch beams (especially in dusty or foggy conditions) create a strong mental image of light as a directed beam.
The reality: Light spreads out in all directions from most sources (like light bulbs or the sun). It fills every space it can reach, which is why an entire room gets lit when you turn on a ceiling light.
How to address it: Compare a torch (directional) to a light bulb (omnidirectional). Notice how a light bulb illuminates objects in every direction, while a torch creates a focused beam in one direction.
Practical Investigations You Can Do at Home
Here are investigations that match the Year 3 objectives and use household materials.
Shadow Size Investigation
What you need: A torch, a small toy or object, a white wall or large sheet of paper, a measuring tape.
What to do:
- Place the toy in the same position throughout the investigation
- Shine the torch at the toy from different distances: very close, medium distance, far away
- Measure the height or width of the shadow on the wall each time
- Record the results in a table
- Ask your child: "What pattern do you notice? What happens to the shadow when the torch is closer?"
What they'll learn: The relationship between light source distance and shadow size. This teaches pattern-seeking and controlled investigation — changing one variable while keeping others constant.
Transparent, Translucent, Opaque Sorting
What you need: A torch, a collection of materials (cling film, tissue paper, cardboard, clear plastic container, aluminium foil, wax paper, etc.).
What to do:
- Predict which materials will let light through completely, partially, or not at all
- Test each material by holding it in front of the torch and observing the shadow and light transmission
- Sort the materials into three groups: transparent, translucent, opaque
- Discuss: "Were your predictions correct? Did any surprise you?"
What they'll learn: That materials interact with light in different ways. This develops categorisation skills and the habit of making predictions before testing.
Shadow Tracing Throughout the Day
What you need: A sunny day, a stick or object placed in the ground or on a surface outdoors, chalk or paper to mark shadow positions, a clock.
What to do:
- In the morning, trace or mark where the shadow falls
- Return every two hours and trace the new shadow position
- Note the time for each shadow
- At the end of the day, compare: "When was the shadow longest? Shortest? Why do you think that happened?"
What they'll learn: How shadow position and length change throughout the day as the sun moves across the sky. This connects to understanding Earth's rotation and introduces the concept of sundials.
Making Shadow Puppets
What you need: A torch or desk lamp, your hands or cut-out shapes, a blank wall.
What to do:
- Create shadow puppets using hand shapes or cut-out figures
- Experiment with moving your hands closer to and further from the light source
- Experiment with moving your hands closer to and further from the wall
- Try overlapping shadows and observe what happens
What they'll learn: Playful reinforcement of shadow principles: how position affects size and sharpness, how opaque objects block light, and how multiple objects can create overlapping shadows.
Supporting Your Child's Understanding: Questions to Ask
Good questions encourage children to reason rather than recite.
Open-Ended Investigation Questions
- "What do you think will happen if we move the light closer?"
- "Why do you think the shadow is bigger now than before?"
- "Can you make the shadow disappear? How?"
- "What would happen if we used two torches instead of one?"
Real-World Connection Questions
- "Have you noticed your shadow looking different at different times of day?"
- "Why do streetlights create shadows at night?"
- "Why can you see better during the day than at night, even though objects are still there?"
Misconception-Challenging Questions
- "If we turn off all the lights, will we still be able to see? Why or why not?"
- "Does the shadow exist when the light is off, even though we can't see it?"
- "Is a mirror making its own light, or is something else happening?"
What If Your Child Is Struggling?
It is normal for children to find parts of this topic hard. Here is how to help:
Accept and Explore Misconceptions
If your child says something scientifically incorrect, don't just correct them. Ask them to explain their thinking, then set up an investigation that will challenge the misconception through observation rather than authority. "You think the shadow is a thing we create? Okay, let's see if we can pick it up or move it without moving the object. What happens?"
If your child needs the topic explained another way, Fareed is an AI science tutor for this curriculum; it is currently on a waitlist.